I decided to update the X-carriage and extruder that I bought from Semitronics Industries due to several reasons.
-Firstly, the X-carriage (Red part in the picture) that holds the bearings, was too weak at the point where the nuts are held in position. That caused my part to break and I could not tight the bolts anymore.

Figure 0. New model of the X-Carriage and extruder for the Prusa i3.
-The orange part (called waver sometimes or Greg’s extruder) had some extremely thin walls that created some weakness in the structure. It could be improved.
-I also wanted to add a Hobbed Pulley’s in order to improve the dragging of the filament over conventional systems based on a bolt with clefts. This led me to modify the whole internal structure of the part in order to fit this component within it.

Figure 1. Hobbed pulley
-Due to previous reasons I took advantage and modified the part completely adding new features as: new assembly method of the extruder based on a plate, thicker walls, more robust design, elimination of unnecessary features, improved holes for the bolts that port the springs, etc. I will explain these improvements with some pictures.
One of the first problems to notice in the previous design was the orientation of the fan. This one is working towards the X-Carriage and there is no space to turn it 90 deg. In the new version the available space has been improved substantially.

Figure 2. Prusa i3 X carriage and Extruder support from Semitronics (Overview 2)
As we can see in the Figure 3, the nuts on the X-carriage were not completely surrounded within the part and the walls around them were very thin and weak. This was improved by making the two blocks thicker and reducing the nuts from M5 to M4. This can be seen in Figures 6 and 7. Due to previous modification, the lower bearing had to be glued with an epoxy resin since the original cable ties used to fix the bearings obstructed the way for the belt.l.

Figure 3. Inner view of the Prusa i3 X-carriage from Semitronics
In Figure 4 we can see the original bolt with clefts used to pull the filament. Below it is the improved version mounting the Hobbed Pulley. The bolts needed to be extended and the orange part could be simplified since the filament guide (yellow part) cannot touch it anymore.


Figure 5. Side view of the Prusa i3 X-Carriage from Semitronics


The two X-carriages can be compared here. Figure 7 shows the improved version. A more robust design has been achieved. As I mentioned before, the lower bearing needs to be glued since the space occupied by the cable ties is on the way of the belts.

Figure 8. Upgraded waver.

In the picture above it can be seen the mounting method I used for the lower bearing. As the two blocks that hold each side of the belt get bigger, the space for the belt to move gets smaller. And thus, if using cable ties, these would interfere with the movement of the belt. One easy fix is to glue the bearing and not use the cable ties. And it works.
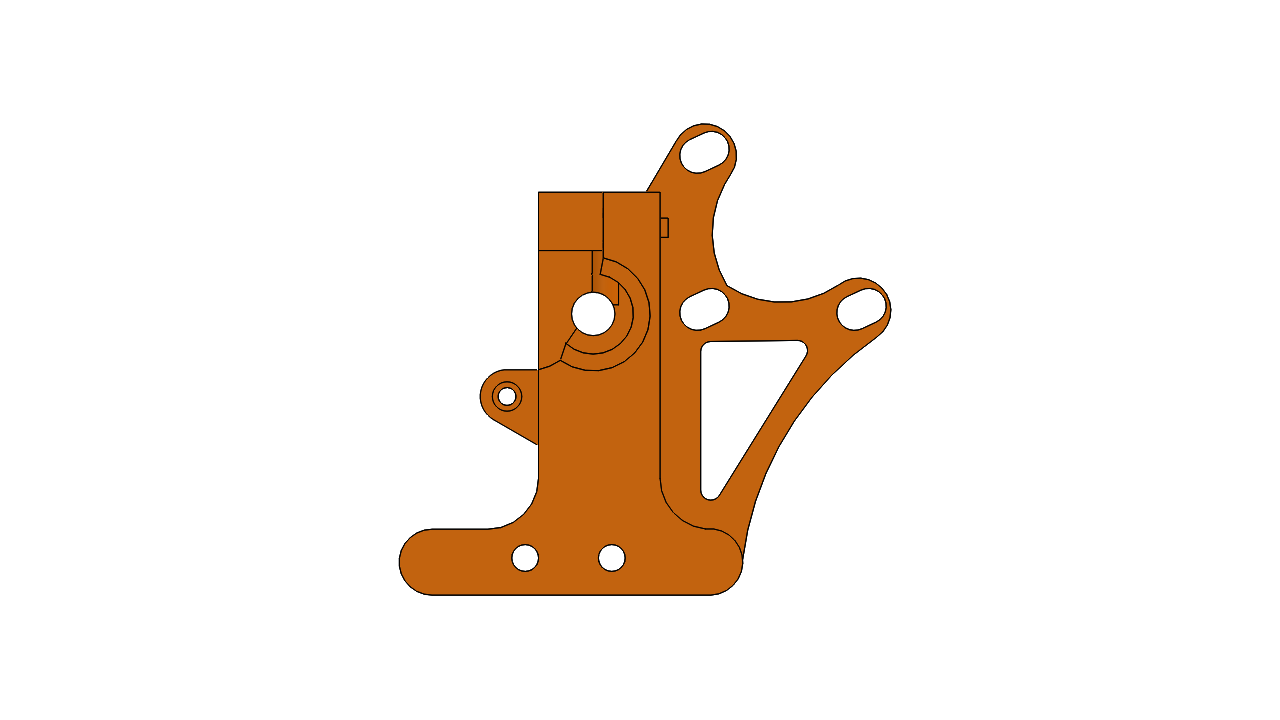

Figure 11. Greg’s Wade Extruder from Semitronics

Figure 12. Upgraded X-Carriage and extruder V1. (Section View)
A section view is shown here. I introduced a new system to fix the extruder into the mounting frame (orange part). A fit hole was added and a plate to press the extruder against the mounting frame.

Figure 13. Upgraded X-carriage and extruder V1 (Complete layout)
This view shows the complete layout of the carriage and extruder together with the belt.
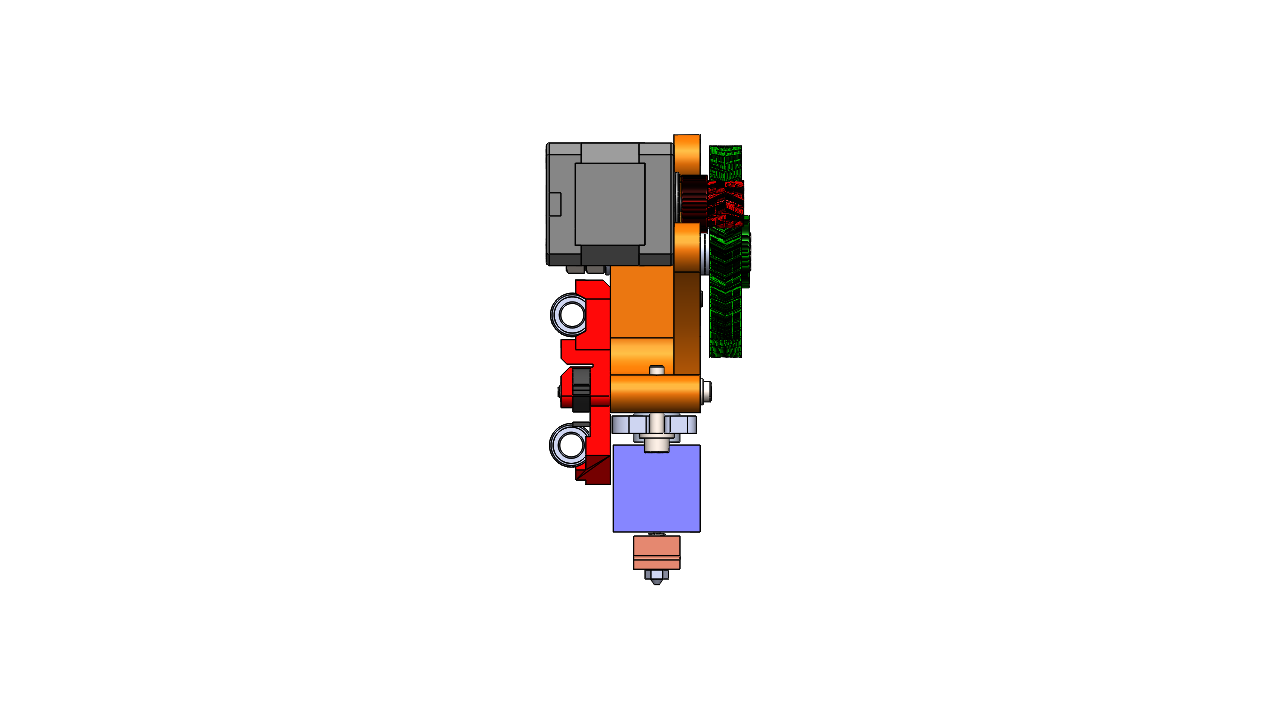
Figure 14. Upgraded X-carriage and extruder V1 (Side View)
Now the fan action is not obstructed anymore.
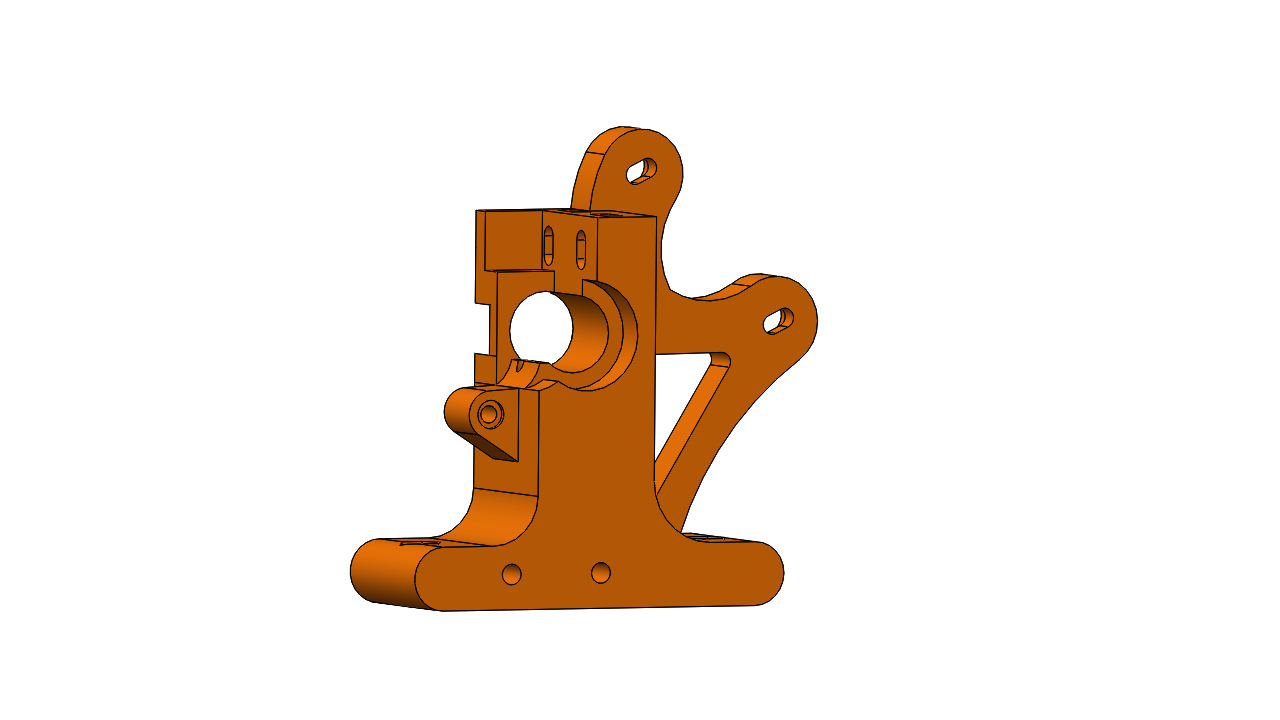
Figure 15. Upgraded Waver of Prusa i3.

Figure 16. Upgraded waver of Prusa i3.

Figure 17. Upgraded waver of Prusa i3.

Figure 18. Upgraded Waver of Prusa i3.
The area between the two slots that serve for the springs has been simplified.

Figure 19. Upgraded Waver of Prusa i3.
The thickness of the waver has been increased and a more robust part was achieved. There have been multiple modifications of this part that are difficult to describe here. Mainly to obtain a more strong model that does not break and also to simplify as much as possible the design.
The link to download these parts and the whole X-carriage should be accessible in on the 29/03/2013 here:
https://www.thingiverse.com/thing:2843370


hi, Is their any way i can get the 3d file so i can make this extruder to replace my stuff make extuder.
LikeLike
Hi I will add a link in a few hours.
LikeLike
thank you
scott
LikeLike
Hi, it should be accessible tomorrow in this link I just posted:
https://www.thingiverse.com/thing:2843370
I will check tomorrow.
Regards
LikeLike